Sewing my first skirt with pockets.
After sewing my angelfish patterned trousers at the start of the summer, I decided it was time to make something with my butterfly fabric.
I ordered this fabric from Woven Monkey last year (take a look at all my designs available here) and it had been sitting in a pile under my desk gathering dust whilst I decided what I wanted to sew with it. I had always planned to make some kind of skirt, and after looking at various shirt and dress patterns, I kept coming back to the idea of making a skirt.
This gathered skirt pattern is ideal for any beginner sewers as it actually doesn’t have a pattern! You need to take just two measurements and cut four rectangles.

Cutting the butterfly fabric.
Materials to sew your skirt:
2 metres of 100% cotton fabric (you’ll have plenty left over, see this article for ideas of what to make with it)
Tape measure
Scissors
11cm zip or longer (I chose a contrasting colour)
Cotton thread (I used white as it blended in with the fabric)
Interfacing (enough for the waistband plus extra to reinforce the edges of the zip)
Sewing machine
Iron

Choosing a contrasting zip colour.
Cutting the skirt pieces.
First take the measurement of wherever you would like the skirt to sit. I wanted mine to sit just above my hip bone so took that measurement. For ease in the instructions below I’ve called it waist measurement.
Then decide how long you want the skirt to be. I chose 60cm as this is the length from where the bottom of the waistband will be to where I wanted it to sit (below the knee).
For the waistband depth, decide how deep you it to be, double that and add 2cm seam allowance. I chose 2cm deep x 2 = 4cm + 2cm = 6cm
So, for the waistband piece:
Waist measurement + 5cm seam allowance x waistband depth (x2) + 2cm seam allowance.
92cm x 6cm
For the front of the skirt:
Waist measurement + 5cm seam allowance x skirt length + 5cm seam allowance.
92cm x 65cm
Remember this is a gathered skirt, so this piece of fabric will look very wide at the moment!
For the back of the skirt:
Waist measurement divided by two + 5cm seam allowance x skirt length + 5cm seam allowance.
48.5cm x 65cm
For the pockets:
I had a pocket pattern piece from the summer trousers I made earlier in the year, so I cut four of these to make the pockets (two face up and two face down). If you don’t have a pocket pattern piece, you can find plenty online by searching ‘pocket pattern’. They’re basically an oval shape with one straight edge/the end of a sock shape.
If you don’t want pockets, you can cut two front pieces, no back pieces, and sew the zip in the side seam instead.

Stretching after crawling around on the floor cutting the fabric!
The interfacing.
Now that you have your pattern pieces, it’s time to iron on the interfacing. Interfacing makes the fabric stiffer so that it has more structure and keeps it’s shape better - perfect for waistbands so they don’t fold and bunch up as you move. It’s also best to do this now so that the fabric has plenty of time to cool before we use this piece later on.
Cut a piece the same size as your waistband, place the interfacing shiny side down onto the back of the fabric and iron in place with a tea towel/t-shirt/spare piece of fabric in between.
Next cut two pieces 2cm wide and the length of your zip and iron one on each edge of the back panels where the zip will go.

Ironing the interfacing onto the back panels to reinforce the zip later on.
Sewing French Seams for the first time.
Whilst I was preparing to sew this skirt, a friend mentioned French seams to me. I’d never heard of them but no fraying edges and non scratchy seams, they sounded great! Despite knowing they’d take twice as long, the benefits definitely outweighed this con and I decided to give them a go!
So, what exactly are French seams?
Usually to sew a seam, let’s take a standard side seam with no pockets for example, you pin the right sides of the fabric together and stitch along the edge, usually with a 2.5cm seam allowance. Then when you turn the fabric the right way round there is your seam. The only problem with this is unless you have an overlocker to give you a clean finish, or zig-zag stitch along every edge, these raw edges will fray and can also feel a little scratchy depending on the garment you are making.
Now with French seams, you pin the wrong sides of the fabric together and stitch along the edge as if you were going to sew the seam inside out. However you need to remember the 2.5cm seam allowance is the overall seam allowance, so here you need to sew just 1 cm. Then you turn the fabric so the right sides are together. Push the seam out with your finger so there is no extra fabric folded into the seam and press with an iron. Now stitch the seam as usual, but this time with a 1.5cm seam allowance to bring the total seam allowance up to 2.5cm.
You’ll end up with a beautifully neat, clean seam on the inside, with all the scratchy raw edges hidden in the seam and the outside looking the same as without French seams. I absolutely loved the finished look and wish I had known about them before sewing my summer trousers a few months ago.
Adding pockets.
Now, as we’re using French seams, the pockets will take a little longer than usual. I suggest reading through this section before sewing anything so you know what’s coming next. I’ll describe just one pocket and then you can repeat the process for the second pocket.
First pin the front pocket piece to the front of the skirt, with the wrong sides together. Align the top edge of the pocket with the top seam of the skirt. Now stitch the pocket along the side seam using a 1cm seam allowance (don’t forget we’re using French seams but still have a total overall seam allowance of 2.5cm).
Now turn the pocket so the fabric is right sides together and iron it as described in the French seams section above. Then stitch along the side seam of the pocket with a 1.5cm seam allowance.
Next repeat this for the back pocket piece on one of the back skirt panels.
Once you have the pocket pieces stitched in place, it is time to sew the side seams. First, pin the front and back skirt pieces wrong sides together (I think you’re getting into the swing of this now!), and around the pocket pieces with them sticking out. Sew all around the edge with a 1cm seam allowance.
Again, turn the skirt wrong sides together, pushing the fabric right to the stitching with your finger so there is no extra fabric folded into the seam, especially around the curves of the pocket. Press.
Then stitch all the way around the pocket and down the seam with a 1.5cm seam allowance. Turn the skirt the right way round, keeping the pocket inside the skirt and press the seam open.
Repeat for the second side.
How to sew gathers.
By choosing to make a gathered skirt, it means you don’t have to worry about tucks, sizing and getting the fit right - so long as the waist measurement is correct and you have a long enough zip, it’ll definitely fit!
Gathers are very easy to do once you know how and these ones don’t require any elastic. Perfect.
To sew the gathers, sew two parallel lines along the top edge of the skirt pieces. Sew the first line 1cm from the edge and the second 1.5cm from the edge. Use the longest stitch you can and leave long threads (10cm) at each end as this makes it easier to pull them in the next step.

Sewing two lines of stitching to create the gathers.
Now grab the two threads at the back of the fabric that came from the bobbin (not the two that came from the front and the top spool) and gently pull them both, creating gathers in your fabric. Pull the threads at both ends of the fabric to make it easier to gather the fabric evenly.
Fold the waistband to find the centre point and then the quarter points (remember to adjust slightly for the seam allowance) and pin these points to mark them. You can then use these markers on the waistband to measure how much you need to gather the fabric.

Pulling the bobbin thread to create the gathers.
The waistband.
Place the waistband and the gathered panels right sides together and pin in place, making sure the gathers are evenly spaced, using the pin markers to guide you. Sew in place between the two rows of gathered stitches.
As you sew, be sure to make sure the pockets are facing towards the front of the skirt. I didn’t check this and accidentally made them face backwards - not particularly useful! This called for some unpicking and resewing!

Stitching the gathered skirt panels to the waistband.
Iron along the free edge of the waistband, folding it over 0.5cm as you go. This will create a clean edge on the inside of the waistband when we stitch it later. Next we’ll move on to sewing the zip.

Ironing the waistband.
Sewing the zip.
For the zip, I didn’t bother with French seams as I have the interfacing to reinforce the fabric and stop the edges from fraying. However I did use them for the remainder of the seam.
First, pin the zip in place by folding a 2.5cm seam allowance up to the edge of the zipper teeth. As you can see in the picture below I placed my zip too high as I forgot about folding over the waistband later but thankfully it still turned out long enough! Sew in place, with the stitches as close to the edge as you can. Repeat on the other side.
For the remainder of the seam we’ll use French seams again. Place the wrong sides together and stitch with a 1cm seam allowance. Turn the fabric right sides together, press with your iron as before, and now stitch a 1.5cm seam allowance with the right sides together, enclosing the end of the zipper inside the skirt.
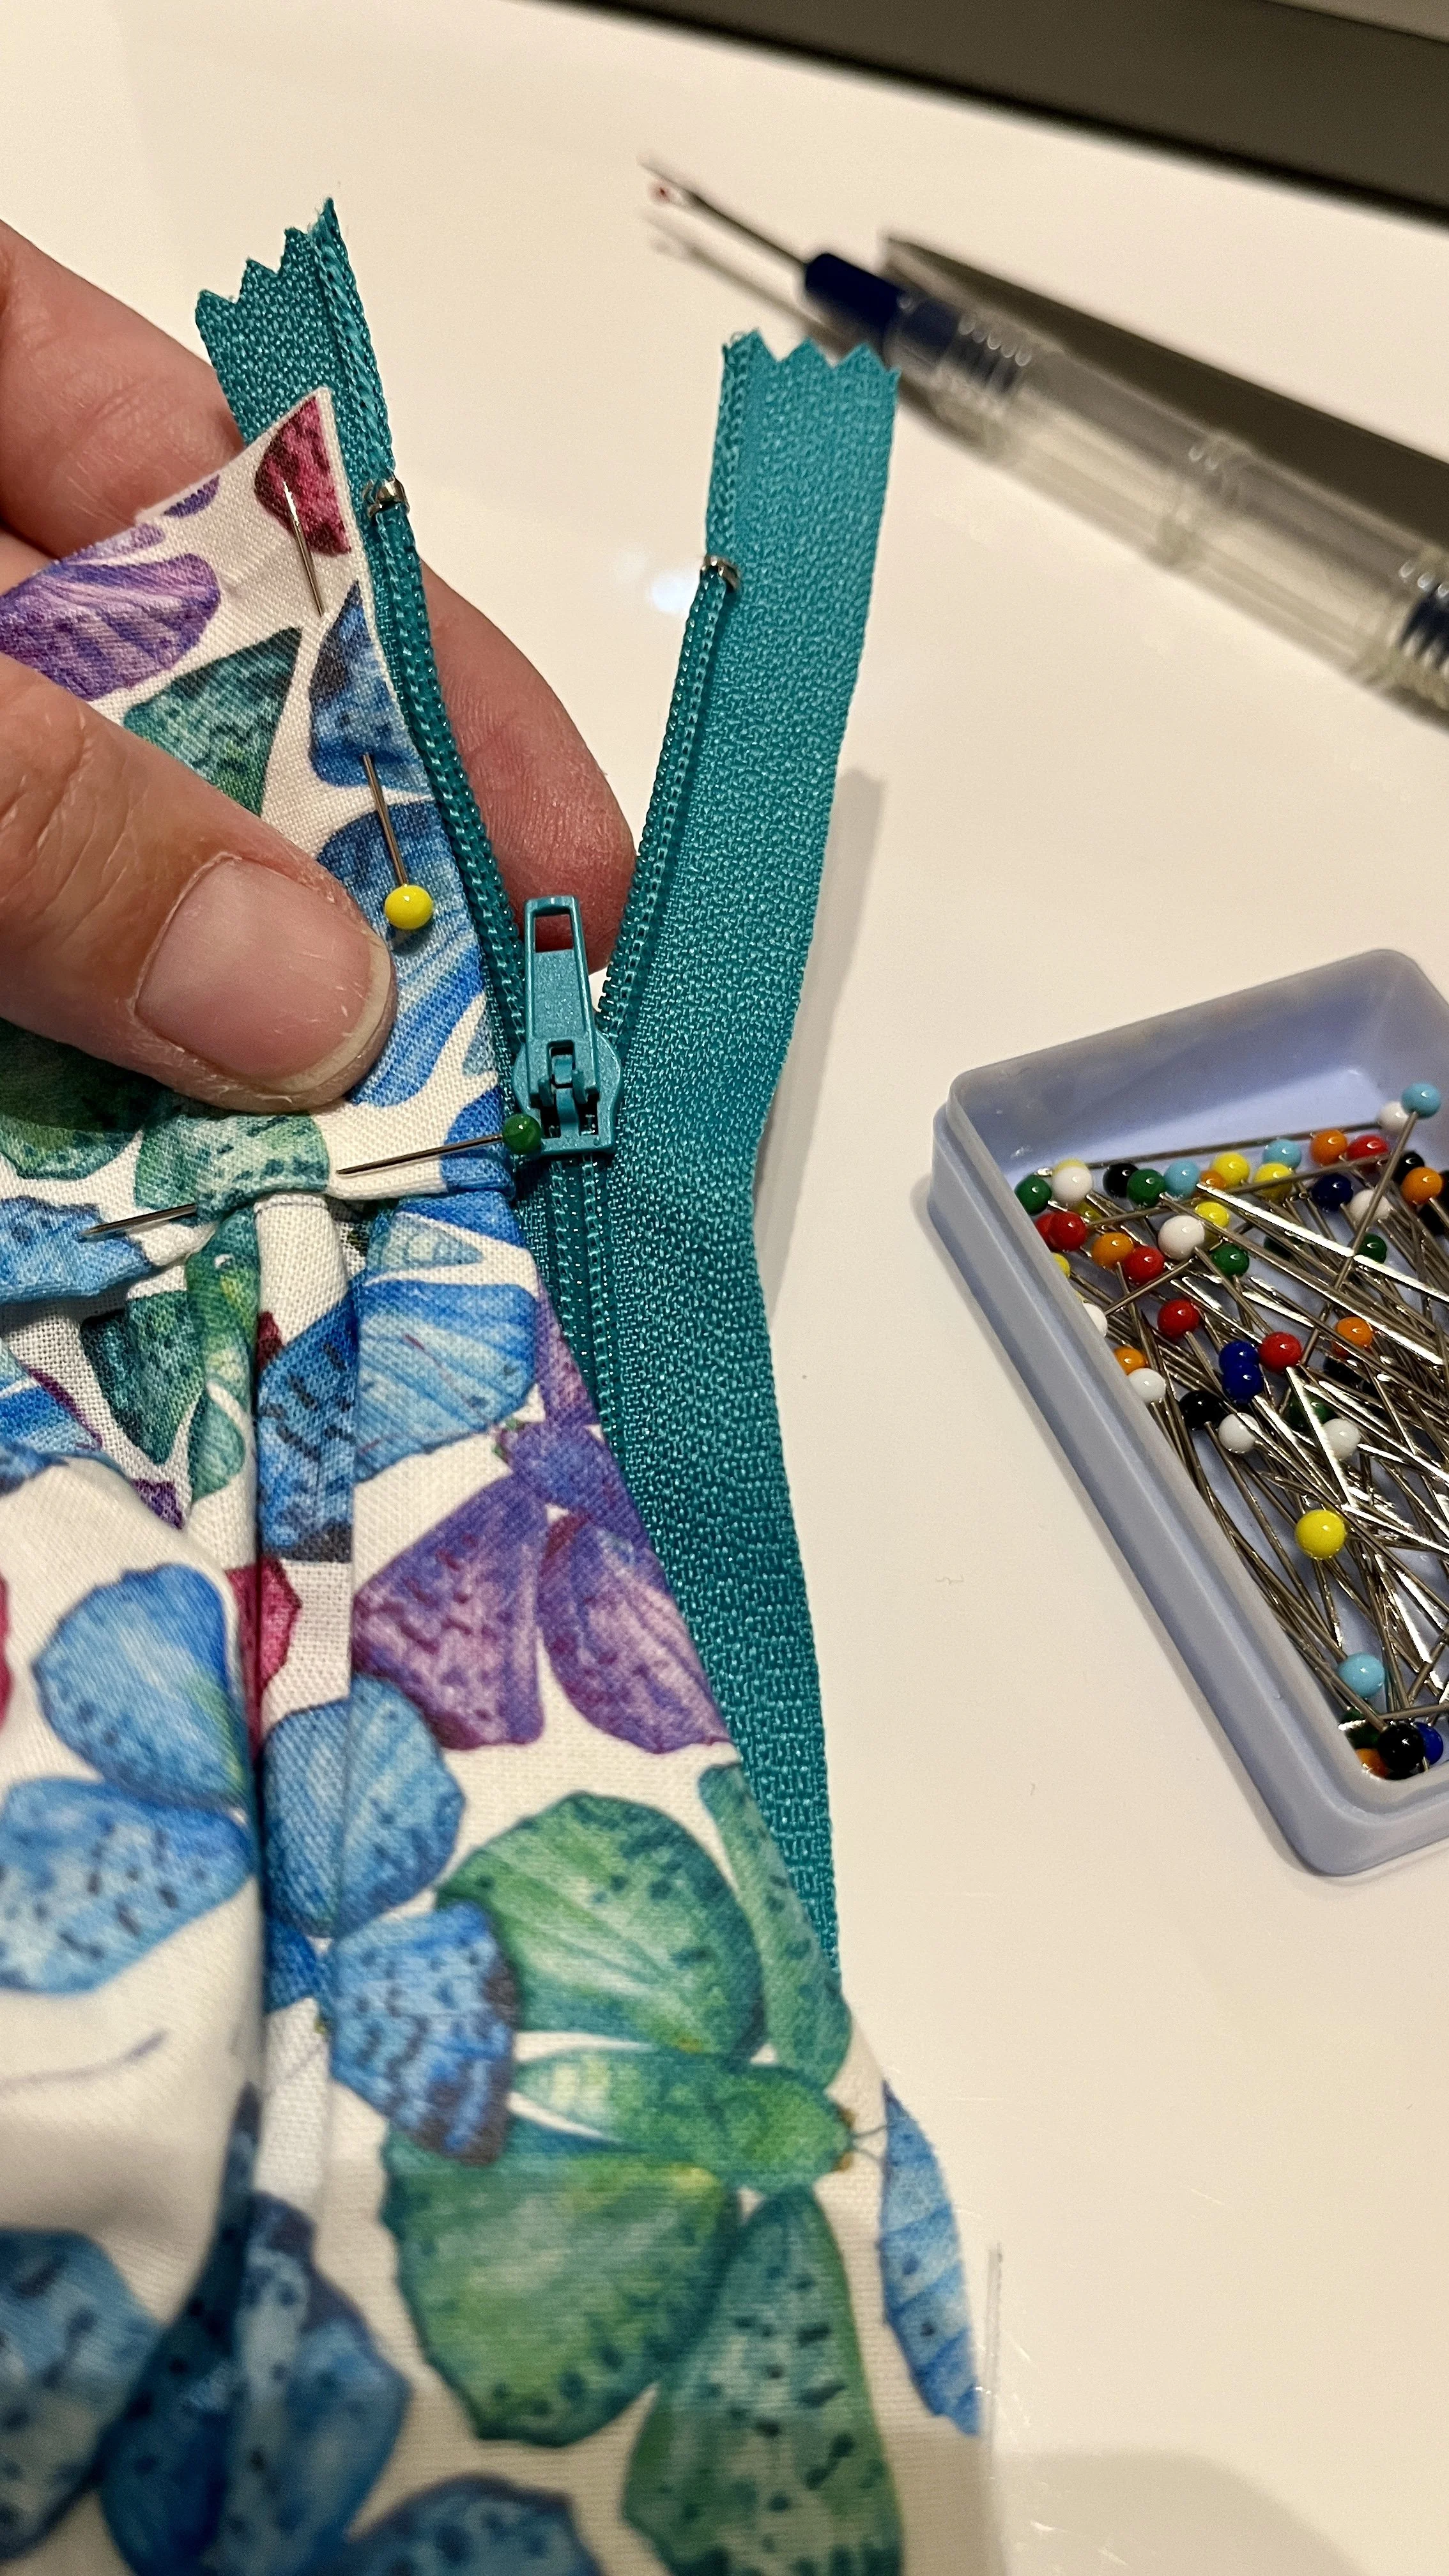
Pinning the zip in place.
Finishing the waistband.
Now fold the waistband so that it covers the gathered stitches and folds over the top of the raw top edge, hiding them inside the waistband, along with the top of the zip. Make sure that the ironed edge of the waistband reaches down to the same level as the folded edge of the waistband at the front so that the following stitches catch both edges of the waistband.
Topstitch along the bottom edge of the waistband. These stitches will show, so take it slow and steady! There are a lot of layers of fabric being stitched together at this point so may need to turn your machine by hand so the needle isn’t forced too much (I did), you don’t want to snap a needle!

Sewing the waistband in place.

The finished zip and waistband.
Hemming your skirt.
We’re almost there! The last thing to do is to hem the bottom edge of the skirt. I knew I had cut my pieces ever so slightly wonky, so using a tape measure from the top edge of the waistband, I checked the length was even as I folded and ironed the bottom edge of the skirt up by roughly a centimetre all the way round. I then folded and ironed it for a second time, enclosing the raw edge inside as I pinned it in place. Lastly, stitch the hem in place. As this topstitching is visible, take it slow and use the markers on the sewing machine to keep a straight line.
My finished butterflies summer skirt.
And here it is! I love how it has turned out - it fits well, is comfortable and is beautifully neat on the inside!

My finished butterflies summer skirt.
The French seams did take me a little while to get my head around, especially for the pockets, but they were so worth it. I am a new convert and will try to use them in all my garments from now on!
It was absolutely perfect to wear in the evenings on holiday. It hardly creased in my luggage or whilst sat at dinner and the pockets meant I didn’t have to carry handbag.
The question now is, what shall I sew next?

My finished gathered skirt.
Want to purchase this butterfly fabric to make your own skirt, or browse the other patterns available? Take a look at the Woven Monkey site via the button below.