July Flowers and Insects Paint Along
Paint Along Materials
For the paint along this month, you will need:
Print out of the design on printer paper (join my mailing list below to receive a copy)
A piece of watercolour paper
Pencil & pen or sharpener
Masking tape or washi tape
Watercolours
A selection of different size paintbrushes
Water & blotting paper
Transferring the Flowers & insects design
After the last couple of paint alongs, a few of you have given me feedback that watercolour paper doesn’t fit through their home printers, so you have been using thinner paper which has wrinkled a lot.
So, to get around this, this month I am showing you how to transfer the paint along design onto watercolour paper by tracing it.
First, print the design onto standard printer paper. Then take it and a pencil and place it front side down against a window. The glass will act like a light box and will enable you to see the design. Now trace over the design on the reverse of the paper using a pencil. You can be quite messy with this, in fact it helps if you are quite bold and shade a lot so that it doesn’t matter if you don’t draw exactly on the lines later on.

Now flip the design the right way round and tape it to your watercolour paper. Press the tape down lightly so that it peels off the watercolour paper easily. This is so that the sheets of paper don’t move whilst you are tracing and end up with a wonky illustration.
Draw the design by tracing over my lines using a pen or a sharp pencil.
Carefully peel off the tape and you are ready to start painting!
If you want to make the lines a little clearer, you can draw over the top before you start painting.
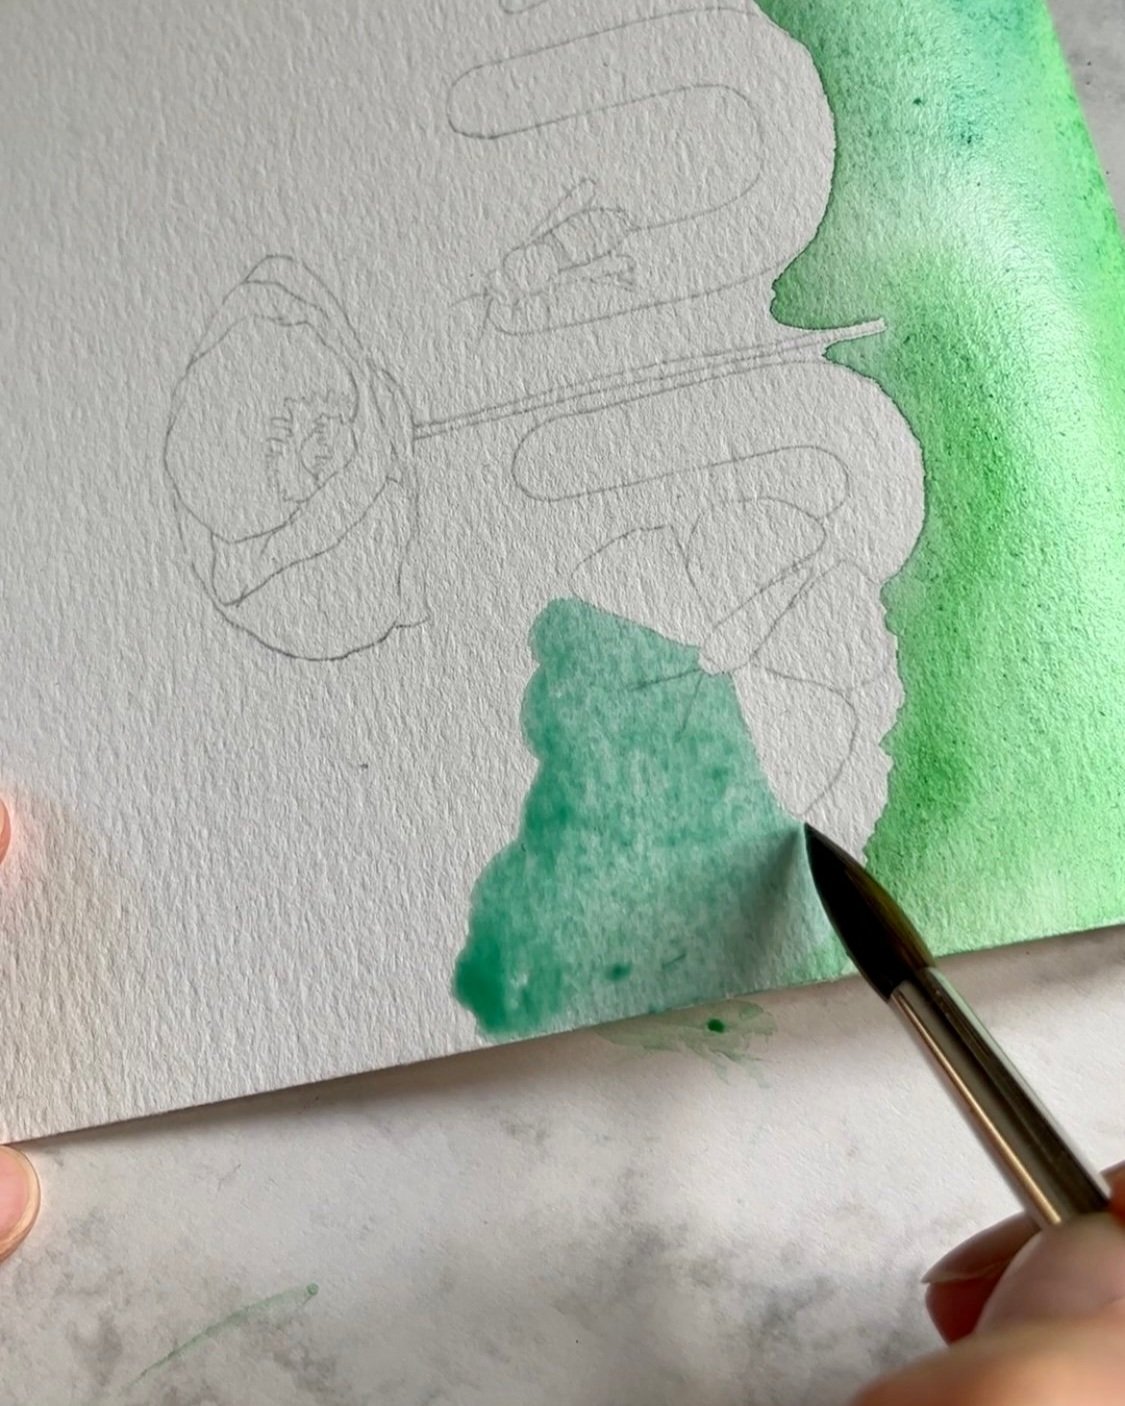
Background wash
For the wash I used a size 8 round brush. I painted an ombré effect from green at the bottom to blue at the top. I used a lot of water for the background wash, so that the colours easily blended together. If you would like to do the same, make sure you are using thick paper (300gsm) or the paper will remain buckled even when dry. The paper I used curled when very wet and returned to it’s original shape once the paint dried.
When you go over the small details, like the ladybird legs, you can paint straight over the top as they will be painted black later on. At the edges of the letters, flowers and other insects, it’s ok if you aren’t too precise as these will eventually be painted in darker colours. Small overlaps and little white spaces are natural parts of watercolour painting so relax and let them happen!
When wet paint meets dry paint, you can gently rub at the line with your paintbrush and drag the colour in both directions to blend in the line and make it less harsh.
Painting wet on wet allows you to create a mottled pattern by using multiple colours close to each other. This is another beautiful characteristic of watercolour painting.

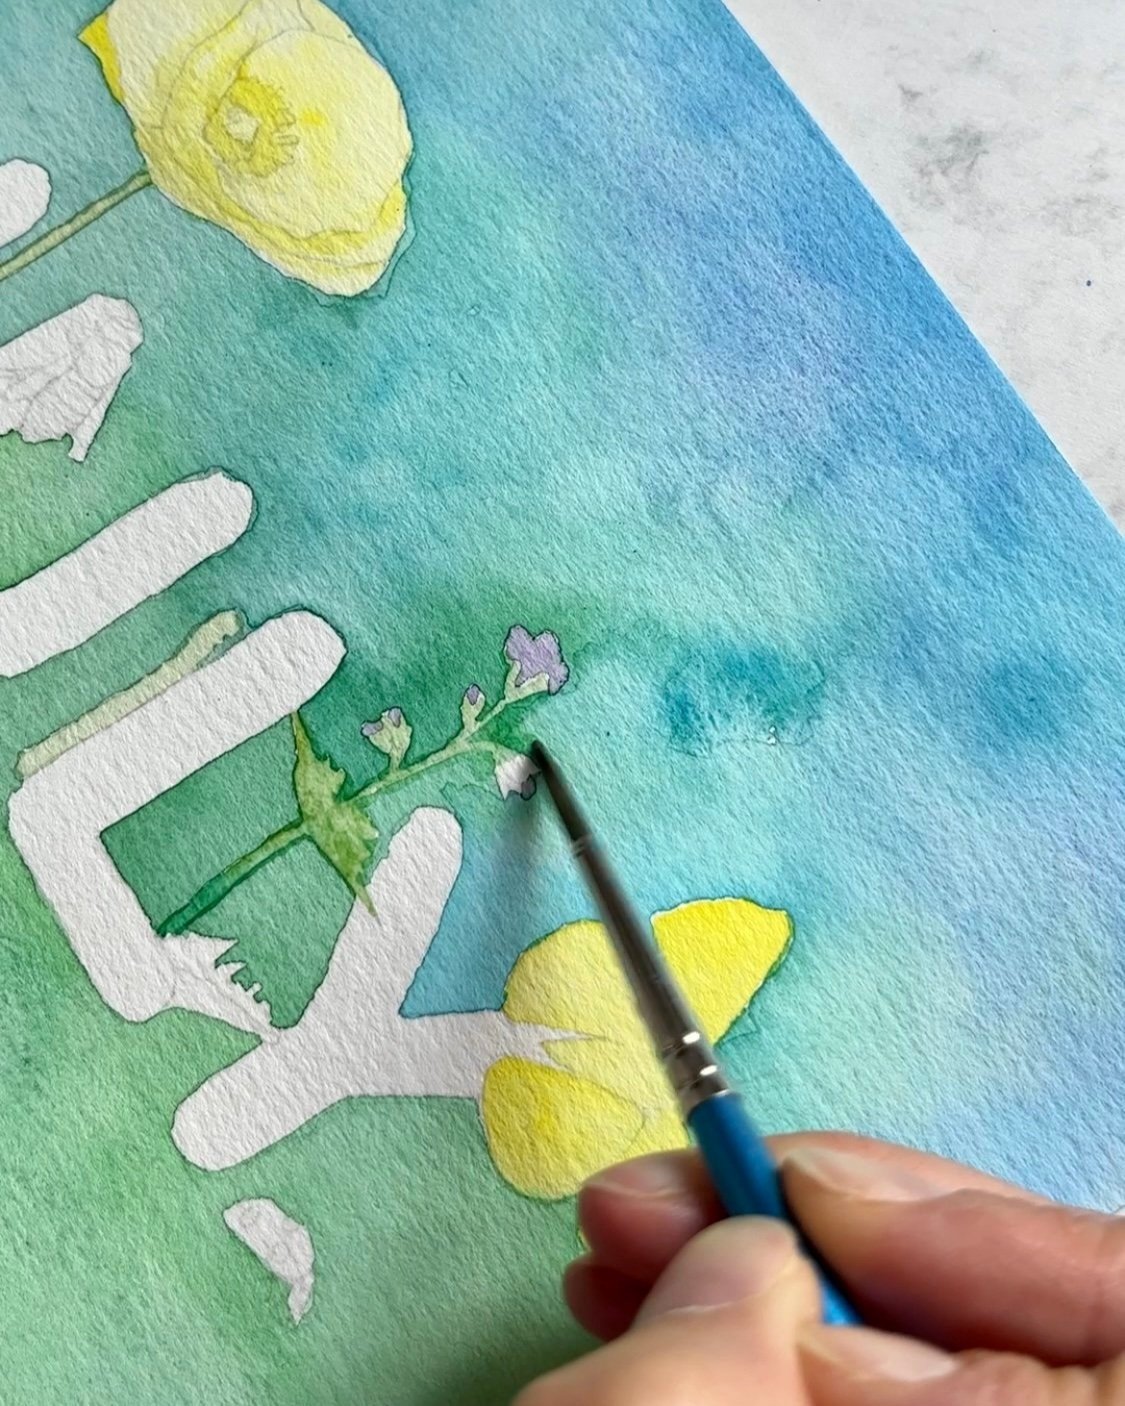
Flowers and insects watercolour wash
If you’ve read any of my previous blog posts or followed my paint alongs on Instagram, you’ll know I like to get rid of the white spaces early on! So now it’s time for a wash of colour on the letters, insects and flowers.
The flower on the right is originally purple, so I went for a purple and yellow colour scheme.
If you go over your previous layer at any point, it will create a darker line where the two layers meet. This is how watercolours layer up, so try to let them be rather than blending them together.
When it comes to the leaves and stem of the flowers on the right, if your background is greenish, you can simply paint over the whole thing and the background will become slightly darker in that area rather than just around the edges of the plant.
The lettering
When I use colouring pencils I love to create shading, with the outline being darker and the inside being paler, so that it what I have done here, but with watercolour!
First wash the letters in one colour, I chose pink. Once dry, paint each letter with water, and then outline the letters in a second colour, I chose purple. Allow the colours to bleed as you did with the butterflies and the poppy.
Choose a third colour and outline the letters. Then add a line of water to the inside of these lines, and then using a dry brush, drag the paint towards the middle. You want it to bleed less than the second colour so that you’re left with a double ombré effect.
More details on the flowers and insects
For the insects and flowers you’ll need a thinner paintbrush - I used a size 0 round brush.
You can also mix and match the order of things as you wait for layers to dry.
The butterflies
For the butterflies, paint one wing at a time, and allow them time to dry in between. I painted the top right, then top left, then bottom right, then bottom left to allow them time to dry but also so that I didn’t have to stop and wait!
Paint one wing with water, then paint your chosen colour around the edges and let the colour bleed towards the centre. Once dry, outline the wing in the same colour. Repeat on both butterflies.
Finally I added a few dabs of colour to the bodies, some thin strokes on the front wings and painted in the antennae. You can use a pen or pencil for the antennae if you don’t have a very steady hand or a thin enough paint brush.

The poppy
For the poppy I used the same technique as the butterfly. Paint one petal with water, then paint the edges with your chosen colour and let it bleed towards the centre. Drag and dab at the paint if it merges into one so that it’s more uneven.
For the centre of the flower, I did the same, but in the opposite direction to allow the colour to bleed towards the edges of the petals. Finally, add a few dabs of different colours in the centre.
The purple flowers
For the foliage of the purple flowers I used three shades of green and blended them together as I painted to create texture and shadows.
For the petals I built up the colour in layers using the same shade of purple. When you layer up watercolours, each layer is naturally a shade darker as it dries on top of the first. This naturally creates texture and shadows.

The bee
After creating a honey bee and bumblebee pattern last month, I knew I had to add a bee to this month’s paint along!
Start by painting the yellow sections. Remember with watercolour we want to start with the paler colours and then add the darker ones. Once dry, paint the black stripes. Try to keep the wings white if you can, otherwise a white gen pen or gouache at the end works wonders! I added a few fine paint strokes of grey on the wings at the end for some texture.

The ladybird
I have seen yellow and black ladybirds here in Zermatt, but for this one I’m going to keep it traditional and paint it red with black spots.
Begin by painting the red body. Once dry, paint in the legs, wing, head and spots in black. The green background wash and red body meant that I could no longer see the tracing of the legs and spots so I kept the original design to hand as a guide for where to paint. If you want you can use a black fine liner for the legs. As with the black paint, make sure the paper is completely dry before using a fine liner or the ink with spread and you’ll be left with a big black blob!

The caterpillar
I have seen so many different coloured caterpillars over my time in the Alps. Either copy the colours I have used or invent your own! I chose blue and black as they fit nicely with the other colours on the page. I then added the touches of white gouache to help the caterpillar ‘pop’. They also often have three colours or more!

Here is the final piece! Don’t forget, when you subscribe to my email newsletter, you get all my monthly paint along print outs for free. Do tag me on Instagram @alpinetonesillustration if you complete the painting, I love seeing your work!

If you enjoyed this month’s paint along and would like to do more, take a look at my tutorials page.